【WordPress】前後の記事を自作する方法
WordPressで前後の記事を設置する際に、プラグインを使いたくなかったため自作した。
前提
下記のクラスを定義済みの想定とする。
手順
前後の記事を表示するクラスを定義する
下記のクラスをPHPで定義する。
クラス内に定義されている定数のTHUMBNAIL_WIDTHとTHUMBNAIL_HEIGHTには任意のサムネイルサイズを指定する。
final class NearPosts extends StaticClass {
    const PREVIOUS_POST_ID_KEY  = 'previous-post-id';
    const THUMBNAIL_NAME        = 'near-posts';
    const THUMBNAIL_WIDTH       = 140;
    const THUMBNAIL_HEIGHT      = 84;

    public static function show() {
        $current_id    = get_the_ID();
        $previous_id   = get_post_meta( $current_id, self::PREVIOUS_POST_ID_KEY, true );
        $next_data     = self::get_next_data( $current_id );
        $has_next_post = $next_data->have_posts();

        $have_not_near_posts = !$previous_id && !$has_next_post;
        if ( $have_not_near_posts ) return;

        $have_both_posts = $previous_id && $has_next_post;

        echo $have_both_posts ?
            '<div id="near-posts" class="both">' :
            '<div id="near-posts" class="single">'
        ;

        if ( $previous_id )     self::show_previous_post( $previous_id );
        if ( $has_next_post )   self::show_next_post( $next_data );

        echo '</div>';
    }

    private static function get_next_data( $current_id ) {
        return new WP_Query( [
            'posts_per_page'        => 1,
            'meta_key'              => self::PREVIOUS_POST_ID_KEY,
            'meta_value'            => $current_id,
            'ignore_sticky_posts'   => 1,
        ] );
    }

    private static function show_previous_post( $current_id ) {
        global $post;

        echo <<< 'EOT'
<section class="previous-post">
    <h3 class="title">前の記事</h3>
    <div class="content">
EOT;

        $setting_post = get_post( $current_id );
        if ( !is_null( $setting_post ) ) $post = $setting_post;

        setup_postdata( $post );
        self::show_post_content();
        wp_reset_postdata();

        echo '</div></section>';
    }

    public static function show_next_post( $data ) {
        echo <<< 'EOT'
<section class="next-post">
    <h3 class="title">次の記事</h3>
    <div class="content">
EOT;

        $data->the_post();
        self::show_post_content();
        wp_reset_postdata();

        echo '</div></section>';
    }

    private static function show_post_content() {
        $permalink  = esc_url( get_the_permalink() );

        self::show_post_thumbnail_or_no_image( $permalink );
        self::show_post_title( $permalink );
    }

    private static function show_post_thumbnail_or_no_image( $permalink ) {
        echo '<div class="thumbnail">';

        has_post_thumbnail() ?
            self::show_post_thumbnail( $permalink ) :
            self::show_post_no_image( $permalink )
        ;

        echo '</div>';
    }

    private static function show_post_thumbnail( $permalink ) {
        printf( '<a href="%s">', $permalink );
        the_post_thumbnail( self::THUMBNAIL_NAME );
        echo '</a>';
    }

    private static function show_post_no_image( $permalink ) {
        $width  = self::THUMBNAIL_WIDTH;
        $height = self::THUMBNAIL_HEIGHT;

        echo <<< EOT
<a href="$permalink">
    <div class="no-image" style="width: {$width}px; height: {$height}px;">
        NO IMAGE
    </div>
</a>
EOT;
    }

    private static function show_post_title( $permalink ) {
        $title = esc_html( get_the_title() );

        echo <<< EOT
<h4 class="title">
    <a href="$permalink">
        <span class="text">$title</span>
    </a>
</h4>
EOT;
    }
}
サムネイルのサイズを追加する
after_setup_themeアクションフックを用いて、サムネイルのサイズを追加する。
( ※ 既にメディアに入っている画像は、追加したサイズのサムネイルが作られていないため再作成が必要となる。 )
function setup_theme() {
    add_theme_support( 'post-thumbnails' );

    add_image_size(
        NearPosts::THUMBNAIL_NAME,
        NearPosts::THUMBNAIL_WIDTH,
        NearPosts::THUMBNAIL_HEIGHT,
        true
    );
}

add_action( 'after_setup_theme', 'setup_theme' );
編集画面に前の記事のIDを入力する領域を追加する
admin_menuアクションフックとsave_postアクションフックを用いて、編集画面に前の記事のIDを入力する領域を追加する。
function add_previous_post_id_field() {
    $on_show = function() {
        global $post;

        $key    = NearPosts::PREVIOUS_POST_ID_KEY;
        $id     = get_post_meta( $post->ID, $key, true );

        echo <<< EOT
<input type="text" name="{$key}" value="{$id}" size="50">
EOT;
    };

    add_meta_box(
        NearPosts::PREVIOUS_POST_ID_KEY,
        '前の記事のID',
        $on_show,
        'post',
        'normal'
    );
}

function save_previous_post_id( $post_id ) {
    $key = NearPosts::PREVIOUS_POST_ID_KEY;

    empty( $_POST[ $key ] ) ?
        delete_post_meta( $post_id, $key ) :
        update_post_meta( $post_id, $key, $_POST[ $key ] )
    ;
}

add_action( 'admin_menu', 'add_previous_post_id_field' );
add_action( 'save_post', 'save_previous_post_id' );
表示させたい箇所で関数を呼ぶ
テンプレートファイルの表示させたい箇所で下記の関数を呼ぶ。
NearPosts::show();編集画面で前の記事のIDを入力する
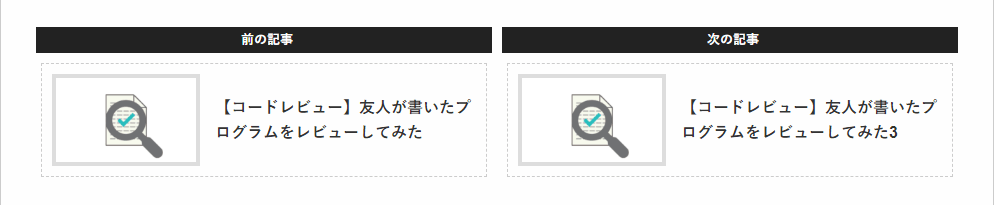
先ほど編集画面に追加した領域に対し、前の記事として表示したい記事のIDを入力する。

これで編集中の記事には「前の記事」として入力したIDの記事が表示され、入力したIDの記事には「次の記事」として編集中の記事が表示される。
<div id="near-posts" class="both">
	<section class="previous-post">
		<h3 class="title">前の記事</h3>
		<div class="content">
			<div class="thumbnail">
				<a href="http://sample.com/post1/">
					<img width="140" height="84" src="http://sample.com/post1.png">
				</a>
			</div>
			<h4 class="title">
    			<a href="http://sample.com/post1/">
        			<span class="text">記事1</span>
    			</a>
			</h4>
		</div>
	</section>
	<section class="next-post">
    	<h3 class="title">次の記事</h3>
    	<div class="content">
			<div class="thumbnail">
				<a href="http://sample.com/post3/">
    				<img width="140" height="84" src="http://sample.com/post3.png">
				</a>
			</div>
			<h4 class="title">
    			<a href="http://sample.com/post3/">
       				<span class="text">記事3</span>
    			</a>
			</h4>
		</div>
	</section>
</div>
CSSで見た目を整える
後は出力されたHTMLの各要素に付いているIDとクラスを用いて、CSSで見た目を整える。