【WordPress】記事リストを自作する方法
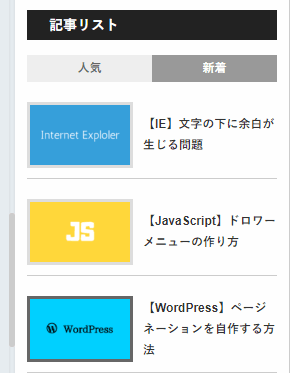
WordPressで記事リストを設置する際に、プラグインを使いたくなかったため自作した。
前提
下記を定義済みの想定とする。
- 【PHP】静的クラス化するクラス
- 【JavaScript】DOMを操作する時によく使う関数の一覧( プロトタイプ拡張 )
- 【JavaScript】要素を押した時のイベントを登録する関数( プロトタイプ拡張 )
手順
記事リストを表示するクラスを定義する
下記のクラスをPHPで定義する。
クラス内に定義されている定数のTHUMBNAIL_WIDTHとTHUMBNAIL_HEIGHTには任意のサムネイルサイズを指定し、POST_COUNTには表示する記事数を指定する。
final class PostList extends StaticClass {
    const THUMBNAIL_NAME    = 'post-list';
    const THUMBNAIL_WIDTH   = 100;
    const THUMBNAIL_HEIGHT  = 60;
    const POST_COUNT        = 10;

    public static function show() {
        echo '<section id="post-list">';
        self::show_title();
        echo '<div class="content">';

        self::show_tabs();
        self::show_posts();

        echo '</div></section>';
    }

    private static function show_title() {
        echo '<h3 class="title">記事リスト</h3>';
    }

    private static function show_tabs() {
        echo <<< EOT
<ul class="tabs">
    <li>
        <div class="tab current">人気</div>
    </li>
    <li>
        <div class="tab">新着</div>
    </li>
</ul>
EOT;
    }

    private static function show_posts() {
        self::show_popular_posts();
        self::show_new_posts();
    }

    private static function show_popular_posts() {
        $orderby_list   = [ 'meta_value_num' => 'DESC', 'date' => 'DESC', ];
        $datas          = new WP_Query( [
            'posts_per_page'        => self::POST_COUNT         ,
            'meta_key'              => PostUtils::VIEW_COUNT_ID ,
            'orderby'               => $orderby_list            ,
            'ignore_sticky_posts'   => 1                        ,
        ] );

        self::show_posts_in_list( $datas, false );
    }

    private static function show_new_posts() {
        $datas = new WP_Query( [
            'posts_per_page'        => self::POST_COUNT ,
            'ignore_sticky_posts'   => 1                ,
        ] );

        self::show_posts_in_list( $datas, true );
    }

    private static function show_posts_in_list( $datas, $is_hidden ) {
        $classes = $is_hidden ? 'posts hidden' : 'posts';
        printf( '<ol class="%s">', $classes );

        while ( $datas->have_posts() ) {
            $datas->the_post();

            echo '<li class="post">';

            self::show_post_thumbnail_or_no_image();
            self::show_post_title();

            echo '</li>';
        }

        wp_reset_postdata();

        echo '</ol>';
    }

    private static function show_post_thumbnail_or_no_image() {
        echo '<div class="thumbnail">';

        has_post_thumbnail() ?
            self::show_post_thumbnail() :
            self::show_post_no_image()
        ;

        echo '</div>';
    }

    private static function show_post_thumbnail() {
        the_post_thumbnail( self::THUMBNAIL_NAME );
    }

    private static function show_post_no_image() {
        $width  = self::THUMBNAIL_WIDTH;
        $height = self::THUMBNAIL_HEIGHT;

        echo <<< EOT
<div class="no-image" style="width: {$width}px; height: {$height}px;">
    NO IMAGE
</div>
EOT;
    }

    private static function show_post_title() {
        $permalink  = esc_url( get_the_permalink() );
        $title      = esc_html( get_the_title() );

        echo <<< EOT
<h4 class="title">
    <a href="$permalink">
        <span class="text">$title</span>
    </a>
</h4>
EOT;
    }
}
サムネイルのサイズを追加する
after_setup_themeアクションフックを用いて、サムネイルのサイズを追加する。
( ※ 既にメディアに入っている画像は、追加したサイズのサムネイルが作られていないため再作成が必要となる。 )
function setup_theme() {
    add_theme_support( 'post-thumbnails' );

    add_image_size(
        PostList::THUMBNAIL_NAME,
        PostList::THUMBNAIL_WIDTH,
        PostList::THUMBNAIL_HEIGHT,
        true
    );
}

add_action( 'after_setup_theme', 'setup_theme' );
表示させたい箇所で関数を呼ぶ
テンプレートファイルの表示させたい箇所で下記の関数を呼ぶ。
PostList::show();これでその箇所に次のようなHTMLが出力される。( img要素が長いため大部分は省略した。 )
<section id="post-list">
	<h3 class="title">記事リスト</h3>
	<div class="content">
		<ul class="tabs">
			<li>
				<div class="tab current">人気</div>
			</li>
			<li>
				<div class="tab">新着</div>
			</li>
		</ul>
		<ol class="posts">
			<li class="post">
				<div class="thumbnail">
					<img width="100" height="60" src="http://sample.com/post1.png">
				</div>
				<h4 class="title">
					<a href="http://sample.com/post1/">
						<span class="text">記事1</span>
					</a>
				</h4>
			</li>
			<li class="post">
				<div class="thumbnail">
					<img width="100" height="60" src="http://sample.com/post2.png">
				</div>
				<h4 class="title">
					<a href="http://sample.com/post2/">
						<span class="text">記事2</span>
					</a>
				</h4>
			</li>
		</ol>
		<ol class="posts hidden">
			<li class="post">
				<div class="thumbnail">
					<img width="100" height="60" src="http://sample.com/post3.png">
				</div>
				<h4 class="title">
					<a href="http://sample.com/post3/">
						<span class="text">記事3</span>
					</a>
				</h4>
			</li>
			<li class="post">
				<div class="thumbnail">
					<img width="100" height="60" src="http://sample.com/post4.png">
				</div>
				<h4 class="title">
					<a href="http://sample.com/post4/">
						<span class="text">記事4</span>
					</a>
				</h4>
			</li>
		</ol>
	</div>
</section>
タブを押した時のイベントを登録するオブジェクトを定義する
タブを押した時に「人気記事」と「新着記事」の表示を切り替えるためのオブジェクトをJavaScriptで定義する。
function PostListEventRegisterer() {
    function _register() {
        const CONTENT = document.querySelector( '#post-list .content' );
        if ( CONTENT === null ) return;

        const TABS = CONTENT.getElementsByClassName( 'tab' );
        if ( TABS === null ) return;

        const POSTS_LIST = CONTENT.getElementsByClassName( 'posts' );
        if ( POSTS_LIST === null ) return;

        const HIDDEN_CLASS_NAME     = 'hidden';
        const CURRENT_CLASS_NAME    = 'current';
        const COUNT                 = TABS.length;
        let   currentIndex          = 0;

        function onPushed( index ) {
            if ( currentIndex === index ) return;

            for ( let i = 0; i < COUNT; i++ ) {
                const POSTS = POSTS_LIST[i];
                const TAB   = TABS[i];

                if ( i !== index ) {
                    POSTS.addClass( HIDDEN_CLASS_NAME );
                    TAB.removeClass( CURRENT_CLASS_NAME );

                    continue;
                }

                POSTS.removeClass( HIDDEN_CLASS_NAME );
                TAB.addClass( CURRENT_CLASS_NAME );

                currentIndex = index;
            }
        };

        for ( let i = 0; i < COUNT; i++ ) {
            TABS[i].registerOnPushed( function() { onPushed( i ); } );
        }
    }

    return {
        register: _register,
    };
};
DOMContentLoadedイベントでオブジェクトを生成し、関数を呼ぶ
PostListEventRegistererオブジェクトを生成し、register関数を呼ぶ処理をdocumentオブジェクトのDOMContentLoadedイベントに登録する。
document.addEventListener( 'DOMContentLoaded', function() {
    const EVENT_REGISTERER = new PostListEventRegisterer;
    EVENT_REGISTERER.register();
} );
hiddenクラスのプロパティを設定する
「人気記事」と「新着記事」の片方を非表示にするため、CSSでhiddenクラスにdisplay: noneを設定する。
.hidden {
    display: none;
}
これにより、タブをクリックすることで「人気記事」と「新着記事」の表示を切り替えられるようになる。
CSSで見た目を整える
後は出力されたHTMLの各要素に付いているIDとクラスを用いて、CSSで見た目を整える。