【WordPress】vccwでローカル環境を構築する方法
WordPressで新たなサイトを立ち上げる際にvccwを使うことにしたので、その手順をメモした。( OSはWindows10 )
手順
Virtual Boxをインストールする
下記のページからインストーラをダウンロードし、インストールする。
Vagrantをインストールする
下記のページからインストーラをダウンロードし、インストールする。
vagrant-hostsupdaterプラグインをインストールする
下記のコマンドを実行し、vagrant-hostsupdaterプラグインをインストールする。
vagrant plugin install vagrant-hostsupdater※ vagrant-hostsupdaterは、Vagrant起動時にVagrantfile( 設定ファイル )に記載した接続情報を設定するプラグイン。これにより、仮想マシンにアクセスする際にホスト名から接続できるようになる。
Boxファイルをダウンロードする
下記のコマンドを実行し、Boxファイルをダウンロードする。
vagrant box add vccw-team/xenial64※ Boxファイルは、仮想マシン起動時のテンプレートとなるイメージファイル。
vccwをダウンロードする
下記のページからzipファイルをダウンロードし、展開する。
展開するディレクトリは好きなディレクトリでよいため、開発時に扱いやすいディレクトリにしておく。
設定ファイルを作成する
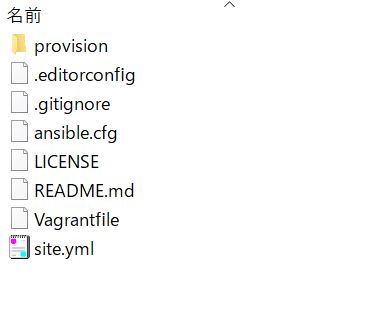
展開したvccwのフォルダ内にsite.ymlというファイルを作成する。
このファイルに設定を書き込むことで、vagrant upコマンドを実行した時にその設定が反映される。
vccwのデフォルトの設定ファイルは、vccwのフォルダ内のprovision/default.ymlであるため、このファイルの内容をコピーして書き換える形でsite.ymlを作成するとやりやすい。
※ site.ymlでXDebugを無効化しておくとよい。( XDebugが有効だと動作が遅くなるため )
# encoding: utf-8
# vim: ft=ruby expandtab shiftwidth=2 tabstop=2
#
# General Settings
#
wp_box: vccw-team/xenial64
#
# Virtual Machine Settings
#
memory: 1024
cpus: 1
#
# Network Settings
#
hostname: vccw.test
ip: 192.168.33.10
#
# WordPress Settings
#
version: latest
lang: ja
title: Welcome to the VCCW
multisite: false
rewrite_structure: /archives/%post_id%
#
# WordPress Path
#
wp_siteurl: '' # Path to the WP_SITEURL like "wp"
wp_home: '' # Path to the WP_HOME like "wp"
#
# WordPress User
#
admin_user: admin
admin_pass: admin
admin_email: vccw@example.com
#
# WordPress Database
#
db_prefix: wp_
db_host: localhost
db_name: wordpress
db_user: wordpress
db_pass: wordpress
#
# WordPress Default Plugins
# Plugin's slug or url to the plugin's slug.
#
plugins:
- logbook
#
# WordPress Default Theme
# Theme's slug or url to the theme's .zip.
#
theme: ''
#
# WordPress Options
#
options:
blogdescription: Hello VCCW.
#
# WordPress Multisite Options
#
multisite_options: {}
#
# The values of wp-config.php
#
force_ssl_admin: false
wp_debug: true
savequeries: false
gitignore: https://raw.githubusercontent.com/github/gitignore/master/WordPress.gitignore
#
# Additional PHP code in the wp-config.php
#
extra_wp_config: |
// Additional PHP code in the wp-config.php
// These lines are inserted by VCCW.
// You can place additional PHP code here!
#
# Theme unit testing
#
theme_unit_test: false
theme_unit_test_uri: https://raw.githubusercontent.com/WPTRT/theme-unit-test/master/themeunittestdata.wordpress.xml
# theme_unit_test_uri: https://raw.githubusercontent.com/jawordpressorg/theme-test-data-ja/master/wordpress-theme-test-date-ja.xml
#
# DB will be reset when provision
#
reset_db_on_provision: true
#
# RubyGems
# Wordmove will be forcibly installed.
#
ruby_gems:
- bundler
- wordmove
mailcatcher: true
wp_i18n_tools: true
#
# NPM modules
#
npms: []
#
# composer
#
composers:
- phpunit/phpunit:5.6
- squizlabs/php_codesniffer:~2.0
- wp-coding-standards/wpcs:*
# - phpmd/phpmd:*
# - sebastian/phpcpd:*
# - phploc/phploc:*
# - phing/phing:*
#
# wp-cli package commands
#
wp_cli_packages:
- https://github.com/vccw-team/wp-cli-scaffold-movefile/archive/master.zip
#
# Linked Clone for Vagrant v1.8
#
linked_clone: false
#
# Advanced Settings
#
#
# PHP ini values
#
php_ini:
date.timezone: UTC
default_charset: UTF-8
mbstring.language: neutral
mbstring.internal_encoding: UTF-8
post_max_size: 1024M # Same with VVV
short_open_tag: Off
session.save_path: /tmp
upload_max_filesize: 1024M # Same with VVV
xdebug.remote_enable: false
xdebug.remote_host: 127.0.0.1
xdebug.remote_port: 9000
xdebug.profiler_enable: false
xdebug.idekey: VCCWDEBUG
xdebug.remote_connect_back: false
xdebug.remote_autostart: false
synced_folder: wordpress
document_root: /var/www/htmlvagrant upコマンドを実行する
管理者としてコマンドプロンプトを起動し、vccwのフォルダ内に移動する。
移動したらvagrant upコマンドを実行する。これで仮想マシンが起動し、環境が構築される。
※ この状態でブラウザのURLにsite.ymlで指定したホスト名を入力すれば、サイトのトップページが見れる。また、ホスト名/wp-admin入力すると管理画面に入れる。
エラーの対処
自分の環境だとvagrant upコマンド実行後にFailed to open/create the internal networkというエラーが出てしまい、うまくいかなかった。
そのため、下記のページの方法で対処した。